STORE OWNER GUIDE / UPDATED NOVEMBER 2026
Pick and pack your first Shopify order with ToteCue
In this guide
Start with one labeled tote, one worker device and one Shopify practice order. This guide walks you through installing ToteCue, scanning the tote’s QR code and checking items as you pick. Pack the order yourself or hand it off to a teammate.
Install ToteCue
- Open the ToteCue listing on the Shopify App Store and choose Install.
- Sign in if Shopify asks, then choose the store where you want to use ToteCue.
- Review the access Shopify shows and confirm the installation. Then open ToteCue in Shopify Admin → Apps.
Before you start
Ask your store administrator which order to use. You’ll need:
- One tote or bin, a printer and matching paper or labels.
- A phone or tablet with a camera, a worker profile and PIN.
- A ready practice order: an order offered for picking in the worker app.
1. Open ToteCue in Shopify
Already installed? Open Shopify Admin → Apps → ToteCue. If ToteCue isn’t listed after installation, check that you’re in the right store or contact support. Workers can start with setting up their device.
Review the store agreements
If Review your agreements opens, the Shopify store owner reviews the Terms of Service and Data Processing Agreement. Select I agree to the Terms of Service and Data Processing Agreement for this store, then choose Agree and continue. Staff and workers can ask the store owner to complete this step.
If Shopify asks you to choose a plan, review the price, trial and billing dates shown for your store before accepting. See Plans & usage for help.
Follow the guided setup
Home offers Set up ToteCue, Continue setup or Review ToteCue setup, depending on saved progress. You can also open Set up ToteCue from Settings. Check the store, then choose Let’s set up your packing.
- Your store: check that this is the Shopify store you intend to use.
- Packing choices: review photos, label checks and worker preferences, then Save and continue.
- Selling platforms: continue with Shopify, or enable and prepare external stores when needed. External stores start Off.
- Reusable bins: create and print your bins, or choose Set up later.
- Team & devices: save workers and enroll their browsers, or choose Set up later.
- Review & finish: review saved choices and missing basics, then Finish setup.
Leave for now keeps choices already saved. Return later to resume. Use the steps below to check your printer, camera and packing process with a Shopify test order chosen by your administrator. If your store has Practice access, you can also try fictional TikTok Shop or CommentSold orders.
2. Create and label a tote
ToteCue creates the QR codes; you do not buy them separately. Follow the illustrated label guide for pictures of the controls and printout.
- Open Bins & labels, enter 1, choose Review new bins, check its name and choose Create 1 bin.
- Select the label format that matches your paper and printer.
- Choose Print these new labels. Print at actual size, with browser headers and footers off.
- Attach the label where the camera can read it.
- Scan one test label and confirm the displayed bin name matches before printing more.
The QR identifies the bin, not the order. Keep it attached and reuse it after release. Reprint an existing bin’s label to replace a damaged one; creating another bin makes a different identity.
3. Prepare your team’s device
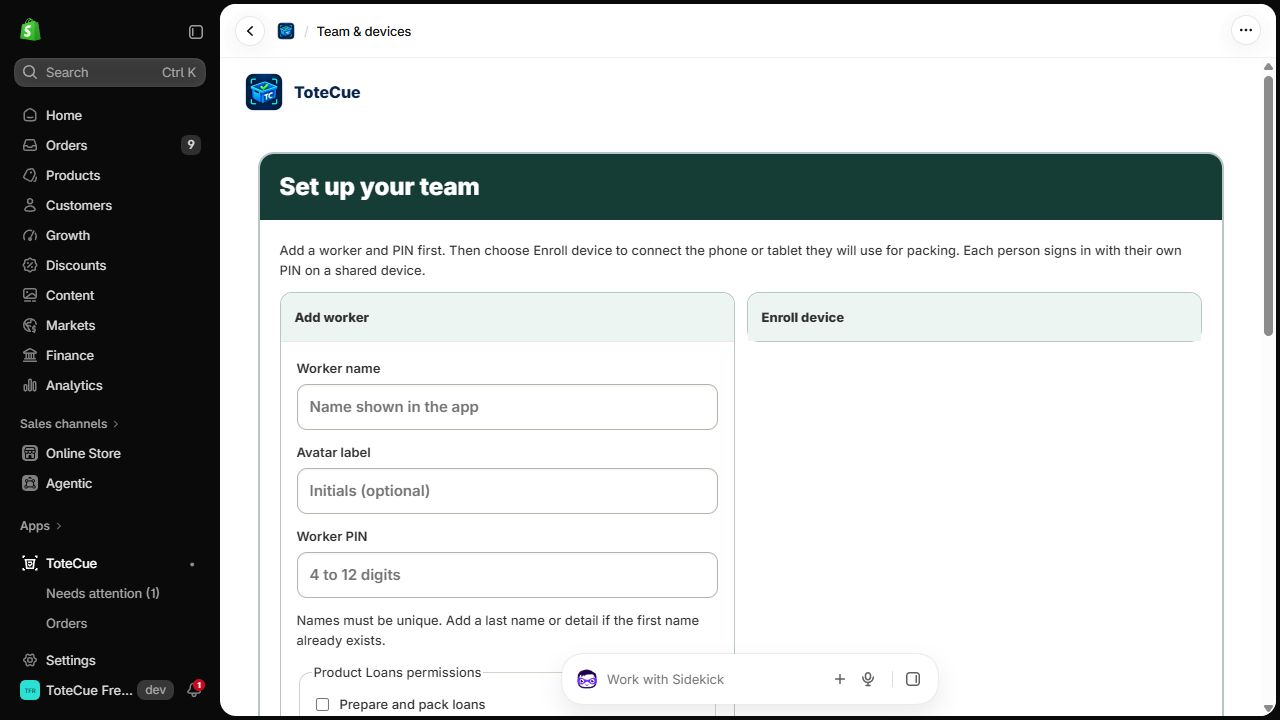
- Open Team & devices → Add worker. Enter a unique worker name and a 4–12 digit PIN, then choose Save worker.
- Open Enroll device, enter a unique device name and choose Create enrollment.
- Scan the enrollment QR with the intended device and browser.
- On that device, choose Set up this device.
- Choose the worker, enter the PIN and choose Start work. Allow camera access when scanning requests it.
Admin worker links open in a new tab. Enroll that browser if requested; opening a link alone does not enroll it. Enrollment links are private, one-use and expire after 15 minutes. An owner who picks or packs also needs a worker profile and PIN.
An enrolled device is a browser registered for worker access. Workers do not need separate Shopify staff accounts. Wall signs and tote QRs do not grant access by themselves. See Labels & devices for recovery steps.
4. Review and save your workflow
- Open Settings and review packing checks.
- Choose your photo policy and whether label matching is enabled or required.
- Set a packing target if you want aging work highlighted.
- Configure order priorities if selected Express methods should come first.
- Choose Save settings before your test.
One person can pick and pack, or a picker can hand off to a packer. Packing verification remains distinct. Review Quality checks for photo rules and label recovery.
If someone needs to stop midway through picking or packing, they can Release to team. Another worker signs in with their own name, opens that order and confirms Take ownership before rechecking and continuing. The order stays in its bin. See worker ownership and takeover.
5. Try one complete order
These steps describe Shopify work. For external orders, follow the TikTok guide or CommentSold guide; their item, photo and label steps differ.
- In Orders, choose Refresh orders.
- In Worker home, choose Select next order, then Scan bin QR to pair your empty tote with the practice order.
- Check the pictured products and quantities as you pick into the tote.
- Choose Pack this order now, or Hand off for packing if another worker will pack.
- Complete the product, photo and label checks required by saved settings.
- Choose Complete package when checks pass. Report unavailable items instead of completing uncertain work.
- Wait for saved completion. Empty the bin and use it for another practice order with the same QR label. Ship the package using your store’s normal process.
You are done when
The worker can sign in, the QR opens the correct bin, completion is saved and the empty bin can be reused. An occupied-bin scan shows its existing order; choose Scan a different bin for new work. Handoff or a hold does not free a bin. Completion is a work record; it does not prove carrier pickup.
Check reported issues as the owner
Admin Home shows an attention warning when work needs review. Choose Open Needs attention to see reported problems and follow-ups. Check it at the start of the day and regularly while the team works. Ask workers to tell you directly about urgent problems too. See issues and owner review.
Where to go next
Read Picking & packing for daily work or Labels & devices before printing more totes. Contact support if setup is unclear.
Review settings and additional stores
Use the illustrated workflow settings guide to understand starting choices and saved examples. For arranged external-store testing, read Connect and prepare a selling store.